Savory Bacon-Wrapped Dates Party Favorite
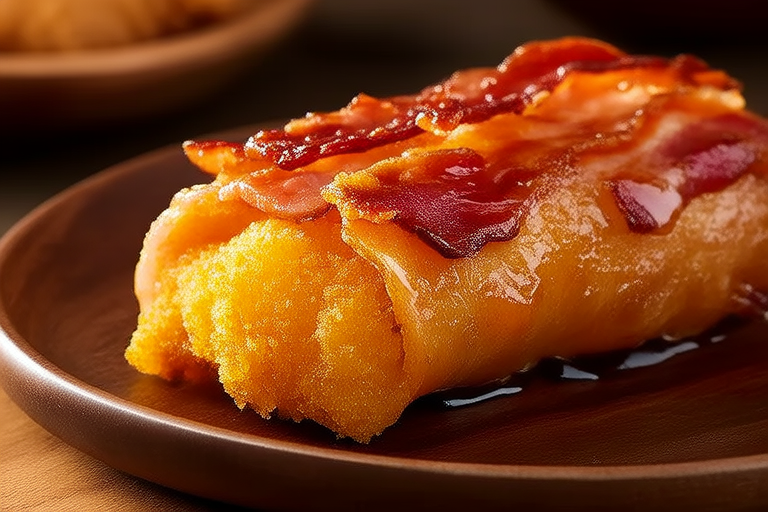
Whether you’re hosting a casual get-together or an elegant dinner party, this Bacon-Wrapped Dates recipe is sure to be a hit. This dish combines the sweetness of dates with the savory smokiness of bacon, creating a delightful contrast that will have your guests asking for more. In this comprehensive guide, we’ll explore the origins of this popular appetizer, provide a detailed recipe, and offer tips on how to elevate your presentation.
The Origins of Bacon-Wrapped Dates
The combination of bacon and dates may seem like a modern culinary creation, but it actually has roots in Middle Eastern cuisine. Dates have been a staple food in the region for thousands of years, often used in both sweet and savory dishes. The pairing of dates with salty, fatty ingredients like bacon adds a rich, complex flavor profile that complements the natural sweetness of the fruit.
In recent years, the popularity of bacon-wrapped dates has skyrocketed in Western countries, particularly as part of cocktail parties and holiday gatherings. Their portability and impressive presentation make them ideal for entertaining. They can be served as hors d’oeuvres or as part of a larger charcuterie board, offering a perfect balance of flavors and textures.
Ingredients
- 24 Medjool dates
- 24 slices thick-cut bacon
- 2 tablespoons olive oil
- 1 teaspoon smoked paprika
- 1/2 teaspoon garlic powder
- 1/2 teaspoon onion powder
- Fresh parsley (for garnish)
Optional: For an extra kick, you can add a pinch of cayenne pepper or a drizzle of balsamic glaze over the cooked dates.
Equipment
- Baking sheet lined with parchment paper
- Wire rack (optional, for draining excess grease)
- Cooking thermometer (optional, for checking internal temperature)
Instructions
- Prepare the Dates: Begin by carefully removing the pits from each date. You can do this by slicing the date lengthwise and gently pulling out the pit with your fingers. If the pit is stubborn, you can use a small knife to help loosen it. Set the pitted dates aside.
- Season the Bacon: In a small bowl, mix together the olive oil, smoked paprika, garlic powder, and onion powder. Use a pastry brush to evenly coat each slice of bacon with the seasoned oil mixture. This step ensures that the bacon will cook evenly and develop a crispy exterior while retaining its moisture.
- Wrap the Dates: Take one slice of bacon and wrap it around a single date, ensuring that the ends of the bacon overlap slightly. Tuck the ends under the date to secure the bacon in place. Repeat this process until all the dates are wrapped. It’s important to keep the bacon snug around the dates to prevent it from unraveling during cooking.
- Preheat the Oven: Preheat your oven to 375°F (190°C). Place the wire rack on top of the baking sheet if you’re using one. This helps catch any excess grease and allows for better air circulation, leading to crisper bacon.
- Bake the Bacon-Wrapped Dates: Arrange the wrapped dates on the prepared baking sheet in a single layer. Bake for approximately 20-25 minutes, or until the bacon is golden brown and crispy. To ensure even cooking, rotate the baking sheet halfway through the baking time. For optimal results, use a cooking thermometer to check the internal temperature of the bacon; it should reach 160°F (71°C).
- Drain and Cool: Once the bacon-wrapped dates are fully cooked, transfer them to a wire rack to drain any excess grease. Allow them to cool for a few minutes before serving. This step also helps the bacon crisp up further.
- Garnish and Serve: Before serving, sprinkle fresh parsley over the top of the dates for a pop of color and freshness. You can also drizzle a little balsamic glaze over the top if desired. Serve immediately while the bacon is still warm and crispy.
Tips for Success
While bacon-wrapped dates are relatively simple to prepare, there are a few tricks to ensure they turn out perfectly every time:
- Use Thick-Cut Bacon: Thick-cut bacon holds up better during the cooking process and provides a satisfying crunch. Thin bacon may become too crispy and fall apart.
- Don’t Overcrowd the Pan: Make sure to leave some space between each wrapped date on the baking sheet. Overcrowding can cause the bacon to steam instead of crisp up properly.
- Keep Them Warm: If you’re preparing these ahead of time, keep the bacon-wrapped dates warm in a low oven (around 200°F or 93°C) until ready to serve. This prevents them from becoming soggy.
- Variations: Feel free to experiment with different seasonings or fillings. Try adding a small piece of goat cheese or a sliver of jalapeño inside each date for added complexity.
Presentation Ideas
One of the best things about bacon-wrapped dates is their versatility when it comes to presentation. Here are a few ideas to take your dish to the next level:
- Individual Platters: Serve each guest their own mini platter with a few bacon-wrapped dates, along with toothpicks for easy eating. Add a small bowl of balsamic reduction or honey mustard for dipping.
- Charcuterie Board: Include the bacon-wrapped dates as part of a larger charcuterie spread. Pair them with cheeses, cured meats, nuts, and fruits for a well-rounded grazing experience.
- Mini Bites: Cut each date into smaller pieces after wrapping, so guests can enjoy bite-sized portions without needing to cut them themselves.
- Floral Garnish: Add a sprig of fresh rosemary or thyme on top of each date for a touch of elegance and fragrance.
Nutritional Information
Each serving of this dish (assuming 4 dates per serving) contains approximately:
| Calories | Protein | Carbohydrates | Fat |
|---|---|---|---|
| 280 kcal | 8 g | 25 g | 18 g |
Note that nutritional values may vary depending on the specific brands of bacon and dates used.
Conclusion
Bacon-wrapped dates are not just a tasty appetizer; they are a versatile and crowd-pleasing addition to any menu. With their sweet and savory combination, they appeal to a wide range of palates and are perfect for both casual and formal gatherings. By following this recipe and incorporating some of the tips provided, you can create a memorable dish that will have your guests coming back for more. Happy cooking!


